
You know how a stubborn musty smell lingers in a room even after a standard filter cleaning? That persistent odour usually points to deep-seated mould thriving inside your cooling system.
An aircon overhaul is our most thorough cleaning service for those exact situations. It completely dismantles the indoor unit to target contamination that a basic wash simply cannot reach.
Living in the Klang Valley means your air conditioning battles high humidity daily. This constant moisture creates the perfect breeding ground for biofilm on the blower wheel and coils.
We see this buildup reduce cooling efficiency by up to 25% if left ignored.
Let’s look at the actual aircon overhaul process and explore why each stage is crucial for restoring performance.
Before We Start
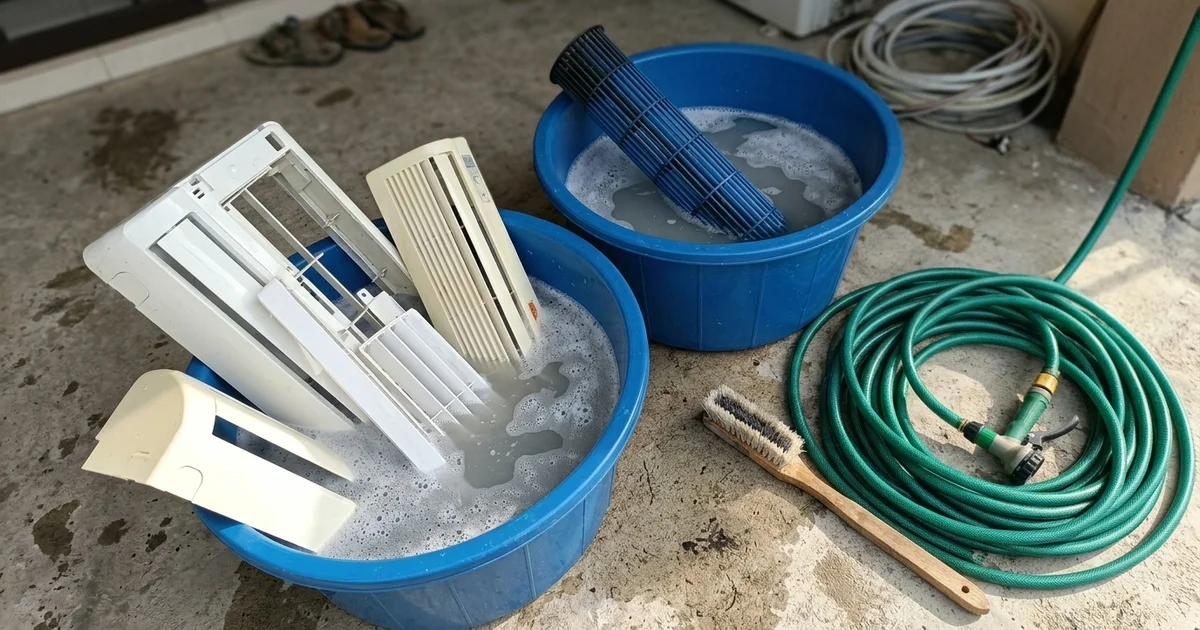
Proper preparation ensures the entire process runs smoothly from the moment our technicians arrive. Since this full dismantle aircon cleaning requires taking apart the entire unit, it takes longer and needs a bit more space than a normal service. We require a designated washing area to set up chemical soaking tubs.
A porch, balcony, yard, or bathroom floor works perfectly for this setup. You will also need to prepare a few specific things before the job begins.
- Clear the area: Move furniture and electronics away from the wall beneath the indoor unit.
- Provide a wash space: Set aside a wet area for soaking large plastic tubs.
- Ensure outdoor access: Clear the path to the outdoor compressor for pressure checks.
- Register with management: Send your block and unit number if you live in a condo, as most buildings require advance work permits.
Step by Step
1. Inspect and protect
Every successful job begins with a careful diagnosis of the running system. Our team briefly runs the unit to check for common issues like short cycling or unusual hissing noises. These sounds often indicate underlying problems with R32 or R410A refrigerant gas leaks.
We then switch off the power at the main breaker for safety. Heavy-duty plastic sheets are laid down to protect your flooring and nearby furniture from chemical splashes.
2. Full dismantle
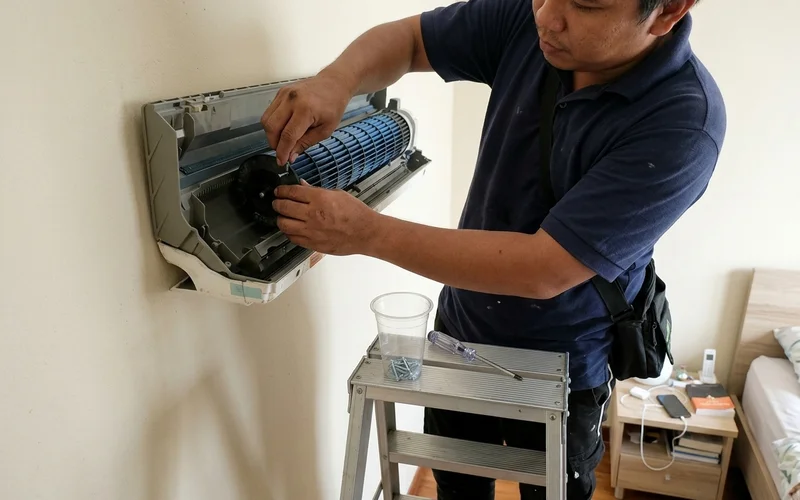
The technician carefully removes the front cover, louvres, filters, and side panels. A standard chemical wash leaves the internal components attached to the wall, but our overhaul completely extracts the drain pan and the blower wheel.
A cracked drain pan is actually one of the leading causes of indoor water leaks across Malaysia. We inspect this tray thoroughly during removal to catch hairline fractures early.
Small parts and screws are kept strictly organised in a cup on the ladder. This ensures every piece goes back exactly as the manufacturer intended.
3. Soak and scrub
The extracted components go straight into a component soaking bath filled with professional-grade cleaning solution. This targeted bath softens years of stubborn dust, cooking grease, and mould.
Malaysia’s high humidity causes thick fungal growth to cling tightly to moving parts. We scrub and rinse each component with clean water after a thorough soak.
The blower wheel receives particular attention during this stage. The narrow gaps between its blades are where the worst bacterial buildup hides and causes that familiar wet sock smell.
4. Wash the coil in place
With the blower and drain pan out of the way, the evaporator coil on the wall is fully exposed. Data from 2026 HVAC reports shows that clogged evaporator coils account for the vast majority of “not cold” complaints in local homes.
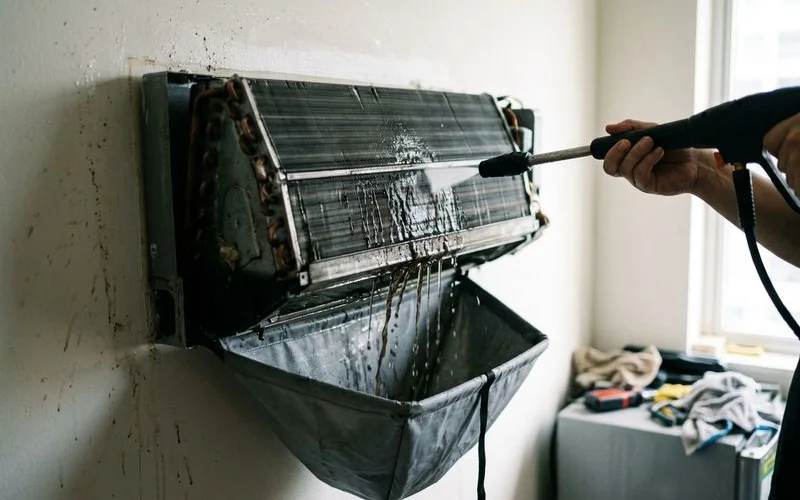
We foam this exposed coil with a specialised, non-corrosive cleaner to break down the biofilm. A high-pressure jet wash then flushes the debris directly into a sealed catchment bag. The technician continues spraying until the runoff water turns completely clear.
5. Service the fan
Preventative maintenance during reassembly extends the lifespan of your moving parts. Our technicians apply fresh lubrication to the fan motor’s bearings before reinstalling them.
A dry bearing is the primary culprit behind those annoying squeaking or squealing noises. We also check the freshly cleaned blower wheel for perfect balance.
Correcting a slight imbalance right now stops severe wobbling and protects the compressor from unnecessary strain.
6. Reassemble
Putting the unit back together requires precision to avoid future drainage issues. Everything goes back in the right order: drain pan, blower wheel, panels, louvres, filters, and covers.
We pay special attention to ensuring the drain pan is tilted at the correct angle. A perfectly levelled tray guarantees condensate water flows directly to the drainage pipe instead of pooling and overflowing into your bedroom.
7. Pressure check and free gas top-up
The focus shifts to the outdoor condenser unit once the indoor components are secure. A manifold gauge measures the exact refrigerant pressure for modern R32 or R410A systems.
Every Complete Overhaul includes a complimentary gas top-up to restore optimal cooling efficiency. A very low pressure reading almost certainly points to a sealed system leak.
We will immediately inform you if the gauge indicates a rapid loss of gas. Topping up a leaking system only buys time and forces your compressor to overwork.
Our team may recommend a permanent leak repair instead, so the gas stays sealed in and you stop paying for repeat top-ups.
8. Test run and clean-up
The final step involves powering up the system for a comprehensive performance test. We check the airflow strength, verify the cold air temperature, and monitor the drainage pipe for smooth water flow.
Proper condensate drainage confirms the newly cleaned pan is functioning correctly. The protective sheets are then rolled up, the soaking tubs are emptied, and your living space is left spotless.
How Long It Takes
You should plan for the entire process to take a few hours per unit. Heavy contamination requires serious patience. The soaking step cannot be rushed, as this is the only way to dissolve thick grease and mould safely. A severely neglected unit might need 45 to 90 minutes just for the chemical bath portion.
We usually start soaking the next unit’s parts while finishing the previous one if you book multiple cleanings. This overlapping workflow saves significant time for larger households.
| Job | Time to plan for |
|---|---|
| One wall split | A few hours (2-3 hours) |
| Two or three wall splits | Most of a day |
| Very neglected units | Add extra soaking time (up to 90 mins) |
What It Costs
A Complete Overhaul is RM180 to RM220 per unit, depending on the horsepower size and current condition. Recent 2026 data shows that a heavily clogged air conditioner uses up to 25% more electricity. Investing in this deep clean often pays for itself by reducing your monthly utility bill by roughly RM40 per unit.
The price includes the following comprehensive steps:
- Full dismantling and reassembly
- Soaking and washing every component
- Coil jet wash
- Bearing lubrication and blower balancing
- A complimentary gas top-up
- A test run and a 7-day follow-up check
Several units at the same address get a multi-unit discount to keep maintenance affordable. We will quote the repair before doing anything extra if we find a separate fault, such as a failing capacitor or a gas leak.
Is it the right service for you?
If your unit was cleaned within the last year and only smells mildly, a chemical wash (from RM160) is probably enough. Our guide on when an aircon overhaul is worth it lists the signs to look for. If you’re not sure, send us a torch photo through the louvres on WhatsApp.
After the Overhaul
Most customers notice a drastic difference the moment they switch the unit back on. You will immediately feel stronger, colder airflow, alongside the complete absence of that musty smell. The fan will operate quietly without any rattling or squeaking.
To keep it that way, book normal services every 3 to 4 months for daily-use rooms in the Klang Valley. Scheduling a lighter chemical wash once or twice a year will maintain this high level of efficiency. Taking these proactive aircon overhaul steps protects your investment and ensures comfortable, clean air all year round.